Vetkoek@Home
Calling Vetkoek ... Calling Vetkoek ...
Vetkoek is one of those unique and peculiarly South African culinary delicacies
that require some first hand experience (and a spot of cultural background) to
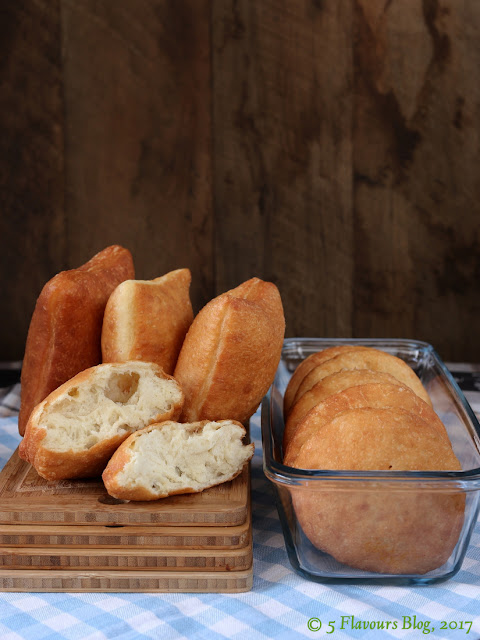
fully comprehend. Essentially it is a crisp, deep fried disc (or ball) of
savoury, yeast risen dough with a fine and tender internal crumb structure when
very fresh. Somewhat confusingly, it can also be prepared from a baking powder
leavened batter (similar to fritters or American frybread) when the cook is in
a hurry. Quality is generally inferior to the more common, yeast risen version.
Whatever the method of production, vetkoek is consumed plain, filled with
savoury or sweet fillings, or a combination of different filling elements –
often combining sweet and savoury tastes.
Vetkoek is the Afrikaans name that literally translates into “fat cake”.
Bear in mind that “fat” refers here – in the proper cultural context – to beef
tallow or rendered pig’s fat. Vetkoek was probably developed by the
Voortrekkers (those hardy, hell for leather forebears of the present Afrikaner cultural
grouping) as a fast substitute for bread on their great treks across the
Southern African veldt during the early to middle eighteen hundreds. There’s no
time to hollow out and fire an anthill (the local, traditional ‘oven’ for
people on the move in those days) when you’re in a hurry or being pursued, but
a cast iron pot over a smallish fire probably made an excellent substitute for
a savvy cook faced with rising dough and a hungry crowd of Trekkers and assorted
drivers.
The name itself is very hard to translate accurately into concise English,
but we’re going to try hell for leather. The common, local English name is “fat
cake” – a misnomer. Properly made vetkoek are not greasy, nor cake like; but
resemble solid donuts (in a savoury style) in internal structure, texture and
general appearance. The Dutch oliebollen
is probably the nearest approximation appearance wise. I suspect the
closest, accurate – yet somewhat ungainly – English name will be “savoury, deep
fried yeast buns”. I have also seen deep fried dough or deep fried burger buns
in print, neither of which quite fit the bill. Amagwinya is the universal
Southern African name for vetkoek.
Today the humble vetkoek is in high demand by all cultural groups. It
makes a filling, nourishing starch base that can be combined with almost
anything an enterprising cook can think of. However, there are limits. My
father developed the Vanilla Vetkoek: a searingly hot, just out of the oil,
crispy vetkoek cut open pita style on one side and filled with a hefty scoop of
vanilla ice cream. You had approximately 75 seconds before that thing devolved
into a mushy, dripping and oh so heavenly mess that afterwards required a large,
very wet dish cloth for returning to some semblance of propriety.
For a gastronomic
experience nipping at the heels of the Divine, vetkoek should be eaten fresh,
straight out of the oil while almost too hot to handle. Slather it (when cut
open) with real butter and honey, golden syrup or chunky apricot jam for a
traditionally South African, almost-over-the-top experience that will wallow
your being in contented, dreamy bliss. The seriously brazen can add a good shot
of well matured, grated cheddar cheese. Chicken mayonnaise is also a popular, local vetkoek filling for the more level headed types.
A personal favorite is a
vetkoek filled with a thinnish layer of aromatic, mildly curried beef mince,
a decent layer of grated, well matured cheddar and one sunny side up, fried
egg. When that runny, golden yolk bursts ... Dear Lord, I need to go have a lie
down! Bear in mind that sucker WILL quietly terrify your lymphatic system in
the background into the screaming heebie-jeebies with all those glorious, unctuous
calories. But screw it, we only live once and we’re not gonna vetkoek everyday,
are we...?
 |
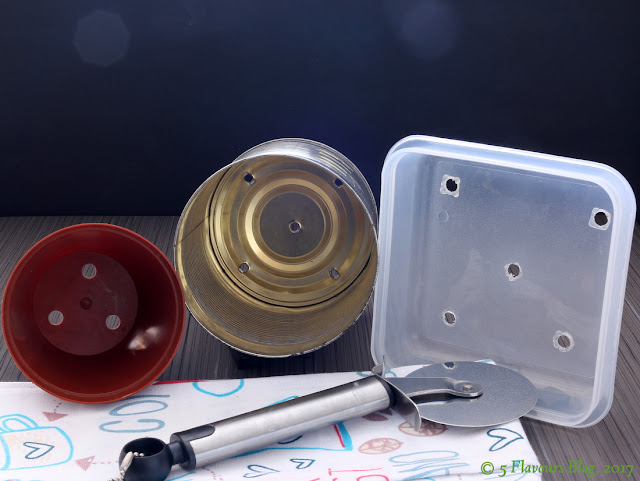
| Improvised Dough Cutters |
Recipe yields:
|
Preparation time:
|
Deep frying time:
|
Difficulty level:
|
12 x 100mm round vetkoek
|
± 60 minutes
|
10 – 15 minutes
|
Somewhat difficult
|
Special Equipment Required:
- 1 x Electrical mixer in the Kenwood Chef or Kitchen Aid class
- 1 x Large, high sided pot for deep frying
- 1 x Rolling pin
- 1 x Improvised dough cutting equipment consisting of a large cookie cutter, empty tin can (perforated at the closed end), plastic flower pot with a thin edge or a pizza cutter.
- 1 x Wire strainer or perforated spoon
- 1 x Drip tray consisting of a wire cooling rack inside a suitably sized roasting pan, oven dish or kitchen tray
Ingredients:
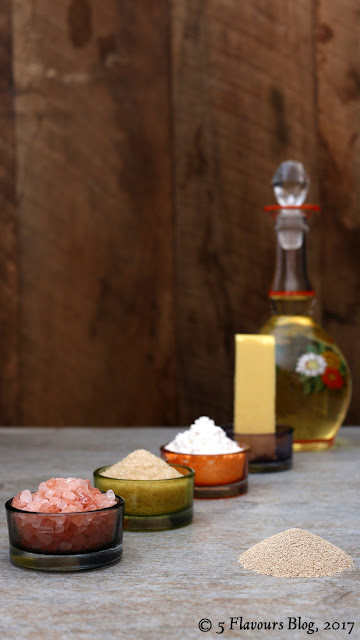
Instant yeast
|
5g
|
Brown sugar
|
10ml
|
Luke warm water
|
100ml
|
Cake flour / All purpose
flour
|
600g
|
Full fat margarine or
butter, molten or very soft
|
50g
|
Brown sugar
|
30ml
|
Salt
|
7.5ml
|
Warm water
|
250ml
|
Good quality sunflower oil
|
2L
|
Method:
- Combine the yeast and sugar in a bowl. Add 100ml of warm water – not hot – and mix thoroughly. Set aside on a warm, undisturbed area of the kitchen counter for the yeast to activate. The yeast will foam and rise up within ±10 minutes. Stir the head of yeast foam back into the liquid before use.
- Combine the activated yeast liquid, flour, shortening, second portion of sugar and salt in the mixer bowl. Scrape all the yeast liquid and foam from its container into the mixer bowl.
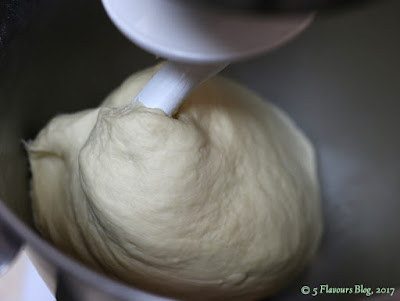
- Mount the mixer bowl in the mixer, attach the dough hook and start mixing on slow speed. Add the remaining warm water in small additions. Mix the ingredients until they come together around the hook in a stiff-ish ball. Use a plastic spatula to scrape the dough down into the bowl as necessary. Add extra flour if the dough is wet and sticky.
- Continue kneading until the dough becomes smooth and ‘dry’ on it’s surface and is firm to the touch. At this point, the dough will creep up the shaft during kneading if left unattended.
- Remove the mixer bowl and form the dough into a ball inside the bowl. Cover with a lightly oiled film of cling wrap or a plastic grocery bag. Set aside in a warm, draft free area of your kitchen and allow to rise until the dough doubled in volume, approx. 35 – 45 minutes, depending on ambient temperature.
- Lightly oil an A5 page sized area of your kitchen counter surface. Punch the dough down when ready. Divide it in half. Form one half into a smooth ball with no folds or creases. Place it on the oiled surface. Store the other half in the mixer bowl, covered, until needed.
- Using the rolling pin, roll the dough out in even, steady strokes until it forms an irregularly shaped sheet approximately 15mm – 20mm thick. Try to roll the dough out with uniform thickness. Regular practice will perfect this skill.
- Cover with a well oiled plastic sheet and leave to rise for 5 – 7 minutes. The sheet of dough will appear puffy and smooth when ready for cutting.
- Using the improvised dough cutter, cut the dough into rounds or squares. 100mm – 120mm diameter is generally a suitable size for an adult. Remove the in-between sections of off cut dough and collect them into a ball. Put aside until needed.
- Combine all the off cuts after rolling the second portion of dough and cutting the vetkoek from it. Knead into a ball by hand until combined, return it to the mixer bowl, cover and allow to rest & rise 5 – 8 minutes in a warm spot. The gluten in the dough will be very well developed by now and will vigorously resist immediate re-rolling, thus the resting period to allow it to relax. Roll the rested ball off cut dough as before, but allow the sheet to rest twice longer than before to allow the gluten to relax, otherwise the dough rounds will shrink badly when cut too early.
- Test the oil: Add an acorn sized ball of dough to the hot oil. It should be just hot enough that it takes about 4 – 5 seconds to rise to the surface and 3 – 4 minutes to get golden brown. The oil will be overheated once it starts to smoke. Remove the pot of oil from the heat and allow to cool down to the point where the test is successful. Any dough fried in too hot oil will cause severe oil splattering and the frying dough will be quite charred on the surface by the time the inside is cooked and ready.
- Once the ideal temperature is reached, add the dough rounds – don’t overcrowd the pot. It will take about four minutes to fry to an appealing, golden brown colour. Turn the frying vetkoek every minute or so for even cooking and colouring. In the process, the vetkoek will puff up to twice their size.
- The vetkoek will be ready when it reaches an even, attractive golden to caramel brown colour on both sides, the bubbling around the frying vetkoek subsides and it feels light in weight relative to it’s size when lifted from the oil with a perforated spoon or wire strainer.
- Transfer the vetkoek to the drip tray and immediately arrange it in upright position to allow excess oil drain off efficiently. Do not stack the draining vetkoek (the bottom ones will be compressed, lose their crispiness and not drain properly), rather use a second drip tray. Drying on sheets of kitchen towel paper will also work, but the oil will not drain properly and the vetkoek will lose their crispiness on the side in contact with the draining surface.
- Remove the oil from the stove, and cover, when done. Serve and enjoy the vetkoek immediately to great acclaim.
Comments:
- Vetkoek should be eaten fresh, whilst piping hot, for maximum effect. Store any remaining vetkoek (once cooled) in a sealed container at room temperature for up to two days. Do not refrigerate (refrigeration will cause vetkoek to become oily, tough and stodgy). Reheat gently – covered under a layer of kitchen towel paper – in a microwave oven at medium power until warm, not hot. Reheated vetkoek will not regain their crispiness, but will still be fair to eat.
- The vetkoek dough can also be rolled out on a surface thoroughly dusted with flour. However, the vetkoek baked from the re-rolled, off cut dough may crack or burst open in the hot oil, spoiling their appearance and turning them dry inside. The absorbed flour will cause the off cut dough to become stiff and unpliable, thus interfering with the internal formation of gas bubbles and their subsequent swelling and development into an even, uniform crumb structure when cooked.
- How many times can the oil be re-used? Three, maybe four times – depending on how many vetkoek are fried with each session and how the cooled oil is stored. Oxygen and water, aided by heat, are the true enemies of vegetable oil, not heat (in moderation) as such. Keep the used oil clean – remove any particulates and pieces of dough broken or flaked off during frying. Return the cooled oil it to its original container, seal and store away from sunlight. Do not fry any other products or items in the vetkoek oil. Deep frying dough items are sponges for odd flavours introduced by deep frying russians, chips, fish or chicken in the same oil as vetkoek. Any animal fat present will also accelerate the degradation of the vegetable oil. Ultimately, the colour of the cooled oil is the best indicator of its degradation level. Discard the oil once it’s colour deepened to more than twice that of the original. The more expensive brands of oil tend to last longer as more attention is paid to its manufacturing and purification. Also, avoid blended vegetable oils: pure sunflower oil works best in the long run.
- Safety is very important. The hot oil will cause severe, disfiguring burns when spilled. Keep a splash shield (or the pot’s lid) nearby when the dough rounds initially go into the hot oil. Wear a full length apron. It’s difficult to properly gauge the hot oil’s temperature without a suitable thermometer – splattering can cause painful burn wounds too. Be carefull when slipping the dough by hand into the hot oil. Hot, bubbling sunflower oil sometimes forms a thin haze over the surface of the liquid, making it difficult to clearly distinguish – and easy to misjudge – the true surface level, increasing the opportunity for finger tips to come into contact with the hot oil. You’ll make that mistake once, and once only.
- Keep small children, pets and irresponsible adults away from the deep frying vetkoek setup for obvious reasons. When heating the oil over an open gas flame, keep the pot’s lid and a suitably sized carbon dioxide fire extinguisher very, very nearby. For goodness sake, do not try to extinguish an oil fire with water! The cold water will cause a catastrophical steam explosion, flinging gobs of burning oil all over. Perversely, the hot, burning oil floats obscenely eager on water, thus worsening the intensity of the original fire severely. In conclusion: over familiarity, and it’s accompanying disrespect and inattention, tend to cause the worst hot oil disasters. Concentrate and work safe at all times!
- Common faults and mistakes in vetkoek will be discussed in a later posting.
© RS Young,
2017
– RECIPE INDEX PAGE –
Follow Me on Facebook


Robert was dit die resep wat jy in Jacobs straat gebruik het?
ReplyDeleteEinste resep Oom Hein.
DeleteKan net lekker wees. ;)
Delete